
How to Build a Deck in a Bass Boat
As an Amazon Associate I earn from qualifying purchases.
Who doesn’t dream of owning a beautiful bass boat? Buying a shiny new boat can be fantastic but expensive and if money is tight, you may have to put your dreams on hold. Fortunately, there are ways to achieve your dream without spending too much. And, one of the best ways is to buy a used bass boat and build a new deck. While it might not sound the most exciting – or simplest – methods, it’s actually a great way to get the boat of your dreams.
So, how to build a deck in a bass boat?
Sketch and Measure the Deck
Firstly, you have to determine what type of deck you want and what’s best for the boat. The deck can have bow sections or be completely flat; the choice is yours. And, it’s important to consider storage too. You need to sketch out the hull so that you have an idea of what you’re creating and the type of materials you’ll need. When you know the type of deck you want in your bass boat, you should go ahead and measure the length and width of the hull.
It’s also essential to consider a hull that’s suitable for the size of the boat and capacity. For example, if you have a small bass boat, you wouldn’t want to add more than say two chairs for maximum comfort and safety. What’s more, you may want to include storage in the hull’s design or space for rod holders. Again, you need to include these with your sketches.
Gather your Equipment and Materials
Once you’ve measured out, you can go ahead and gather the necessary materials and equipment needed to build the hull. These include:
- Marine-Grade Plywood (Three-Quarter-Inch)
- Fiberglass Cloth
- Epoxy Resin
- Extra Lumber or Scrap Wood
- Hatch Frames and Hinges if you’re Including Built-In Storage
- Latches and Hatch Covers
- Router and Router Table
By gathering all the necessary equipment and materials beforehand will make the process easier. And, it saves you rushing around half-way through looking for resin or saws.
Template or Trace the Hull
Tracing the outline of the hull onto the scrap wood or cardboard can be very useful. Of course, it might seem like a thankless task and it probably won’t look the best either but its necessary. The template will make it easier to trace difficult curves on the plywood later and it’ll save time later too. If you’re using cardboard for your template, you can trace it several times until you get the right shape of the hull.
Then, you can carefully cut the template out. If the template fits into the bass boat then you can trace it onto the plywood. If not, you have to start the process over again if you’ve cut it too small or trim it until it fits properly.
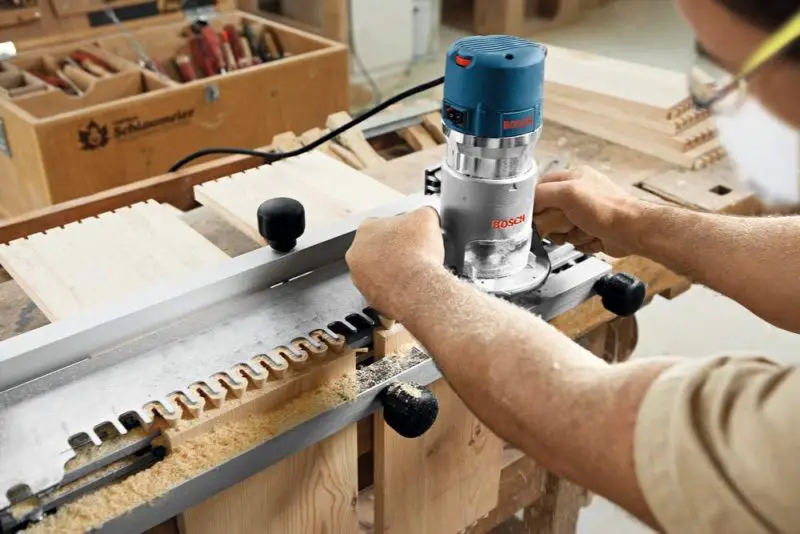
Use a Router Table to Shape the Plywood
A router and router table can make it simpler to cut the deck, especially if you have some difficult curves. Even if you have a fairly simple deck layout, you can still find a router table useful. And, it does make the entire process easier. So, place the plywood on the router table and carefully shape or cut the wood. However, it’s important to cut the plywood bigger rather than to the exact specifications.
While that might sound a bit strange, it’s actually pretty smart because you can always trim the plywood down. On the other hand, if you cut to your exact measurements – and they’re wrong – it’s impossible to add to the wood. It’s always better to overshoot your sizes so that you get a perfect fit. And, the best router table can be useful in achieving this.
What’s more, don’t panic if the bass boat’s hull isn’t level as a slope will drain the water into the cockpit. This prevents deck pooling.
Apply the Epoxy Resin and Fiberglass Cloth
Prepare the epoxy and apply this to one side of the plywood; a thin layer should be sufficient enough. You then need to let this soak into the wood for several minutes before applying more epoxy onto the wood. Then, the fiberglass cloth should be applied over the epoxy. It’s likely there will be some air bubbles under the fiberglass cloth; fortunately, it’s easy to work these out.
However, you need to leave the epoxy to cure for at least twenty-four hours; you may even want to leave it for two days to fully dry. You then need to do the same for the other side and again, leave it to dry. Once both sides have had the epoxy and fiberglass cloth applied, you need to turn your attention to the edges. These need to be sealed but must be done properly to ensure the wood doesn’t take in water and begin to rot.
Install Seat Bases and Other Fittings
Seat bases are fairly easy to install but must be done correctly. So, mark out where the seat bases are to be installed. And, you must measure the space in the boat. Wooden cleats may be more suitable for smaller boats but you could also opt for steel or aluminium. This will depend on the type of bass boat you have.
Once you’ve done the necessary measuring, use a jigsaw to cut out the holes for the seat bases. Do the same for hatches and any other fittings you wish to add to the bass boat hull. All edges must be sealed to prevent water seepage (which can lead to rotting of the wood). Epoxy should be used and stiffeners glued to the deck to help reinforce them against heavy loads.
Fitting the Deck
Next, you need to attach cleats so the deck can rest on them. You may want to use lumber to attach the cleats. If you’re working with a fiberglass hull, epoxy would be the best solution to secure the cleats. You may need to use a sealant to help prevent the water from getting into the wood. And, the hatch covers can also be installed now and sealed.
When you’re fitting the deck, you need to glue it in place to prevent it from moving. Epoxy can be used for this part and should be attached to the mounting cleats. You can seal the join between the hull and deck but it’s not necessary. You don’t always want a rigid joint as boats flex so some movement is wise.
The Finishing Touches
A bass boat should be finished off with paint – however – it must be boat paint so it’s suitable for bass boats and non-skid. Or, you could use some tread material that’s also non-skid, depending on what you prefer for your bass boat. Carpets are a popular addition to bass boats but they’re not always the best solution as they soak up a lot of water. And, can be a breeding ground for mildew and mold.
Get the Most from your Bass Boat
Bass boats can be some of the best vessels to own but buying a brand new boat can be very expensive. Building a bass boat deck in an older boat can be fairly simple and can be a fantastic way to save a lot of money too. With the right tools, including a router table, you can create a wonderful new bass boat.
- 12 Amp router motor - Combines ample power with adjustable speed settings, allowing users to glide along cutlines
- Adjustable speed dial (8000-25,000 RPM). 2 inch sub-base opening
- Fixed base has threaded holes for mounting to router table positioned in common 3-hole pattern
- Now includes RA1161 fixed-base with system for adjusting bit height from above a router table
- Compatible with optional RA1129 template guide adapter set – For easy change of Bosch quick-release template guides and common threaded template guides; Includes RA1126 template guide adapter and RA1100 interface for threaded template guides
Prices pulled from the Amazon Product Advertising API on:
Product prices and availability are accurate as of the date/time indicated and are subject to change. Any price and availability information displayed on [relevant Amazon Site(s), as applicable] at the time of purchase will apply to the purchase of this product.
Amazon and the Amazon logo are trademarks of Amazon.com, Inc, or its affiliates.

Hello,
I am Aubrey D. Rodriguez. I am 40 years old. I am working as a pond hopper boat specialist last 20 years. Feel free to ask me if you have any questions.


